

The first tile floor I ever laid had a lip on nearly every joint. I remember running my hand across the surface and feeling that little ridge, the kind of thing you only notice once the grout is in and the light hits it wrong. I was 14 years into remodeling my own house at that point, and I still made the classic beginner mistake: I trusted my eyes and a rubber mallet instead of a system that would have done the thinking for me. If you are about to tile a floor in your own home, the DGSL Tile Leveling System is the tool I wish someone had handed me before that first job.
This guide is not a product pitch. It is the exact process I use now, step by step, with the DGSL clips and wedges, including the parts that are fiddly and the moments where you will be tempted to skip a step. I have used this system on a bathroom floor, a kitchen floor, and a hallway in my 1962 ranch, and I have made just about every mistake available to a weekend remodeler. Let me save you the ones that cost time.
Flat tile starts with the right clips
The DGSL Tile Leveling System comes with 300 spacers, 100 wedges, and the plier tool you need to tighten them. It is the kit I reach for on every tile job now.
Amazon Check Today's Price on Amazon →Step 1: Set Up Your Work Area and Check the Subfloor
Before you open the DGSL box, spend an hour on the floor itself. The leveling system is brilliant, but it cannot fix a subfloor that moves. I check for deflection by standing in the middle of the room and bouncing slightly. If anything creaks, I screw down the plywood or add a layer of backer board before I lay a single tile. On my kitchen floor, I found a soft spot near the old dishwasher connection and fixed it with three screws and a patch of thinset. That took twenty minutes and saved me from a cracked tile a year later.
Next, make sure the surface is clean and flat. Vacuum, then wipe with a damp cloth. You do not need a laser level for a small room, but you do need a straightedge and a level. Lay the straightedge across the floor in several directions and mark any high spots with a pencil. Grind them down or fill them with self-leveling compound. The flatter the subfloor, the less work the DGSL clips have to do.
Finally, dry lay a few tiles in the center of the room. This is where you decide your layout and your grout lines. The DGSL system uses 1/16 inch spacers, which gives a tight, modern joint. If you prefer a wider grout line, you can use the clips with a different spacer, but I have found the 1/16 inch line looks clean and professional in most rooms. Mark your reference lines with chalk and keep them visible as you work.
Before you mix anything, check the subfloor with a long straightedge. I use a 6 foot level laid flat and slide it across the floor in several directions, looking for gaps underneath. Any dip deeper than about 1/8 inch over 10 feet needs patching with a floor leveling compound first. The DGSL clips pull adjacent tiles flush with each other, but they cannot fix a floor that rises and falls under the whole room. Getting the base flat is what lets the clips do their job.
Step 2: Mix Your Thinset and Set the First Tiles
Mix your thinset according to the bag, and let it slake for the recommended time. I use a drill with a paddle mixer and mix in small batches so it does not dry out on me. The consistency matters more than you think: it should hold a notch when you comb it, but it should not be stiff. If you are new to tiling, mix a small batch first and practice combing it on a scrap piece of plywood.
Start in the center of the room and work outward. Comb the thinset in one direction with your notched trowel, then set the first tile and give it a firm twist. Check it with your level. This first tile is your anchor, and every other tile in the room will reference it. If the first tile is off, the whole floor will be off. I have learned this the hard way, and I now spend an extra five minutes on that first tile.
Set the next few tiles in the same row, leaving a small gap for the DGSL clip. You do not need to be perfect here. The clips will pull the tiles into alignment, but they cannot fix a tile that is set on a thick lump of thinset. Keep your thinset bed even, and do not be afraid to pull a tile up and recomb if it feels high or low.
Step 3: Place the Clips and Wedges as You Go
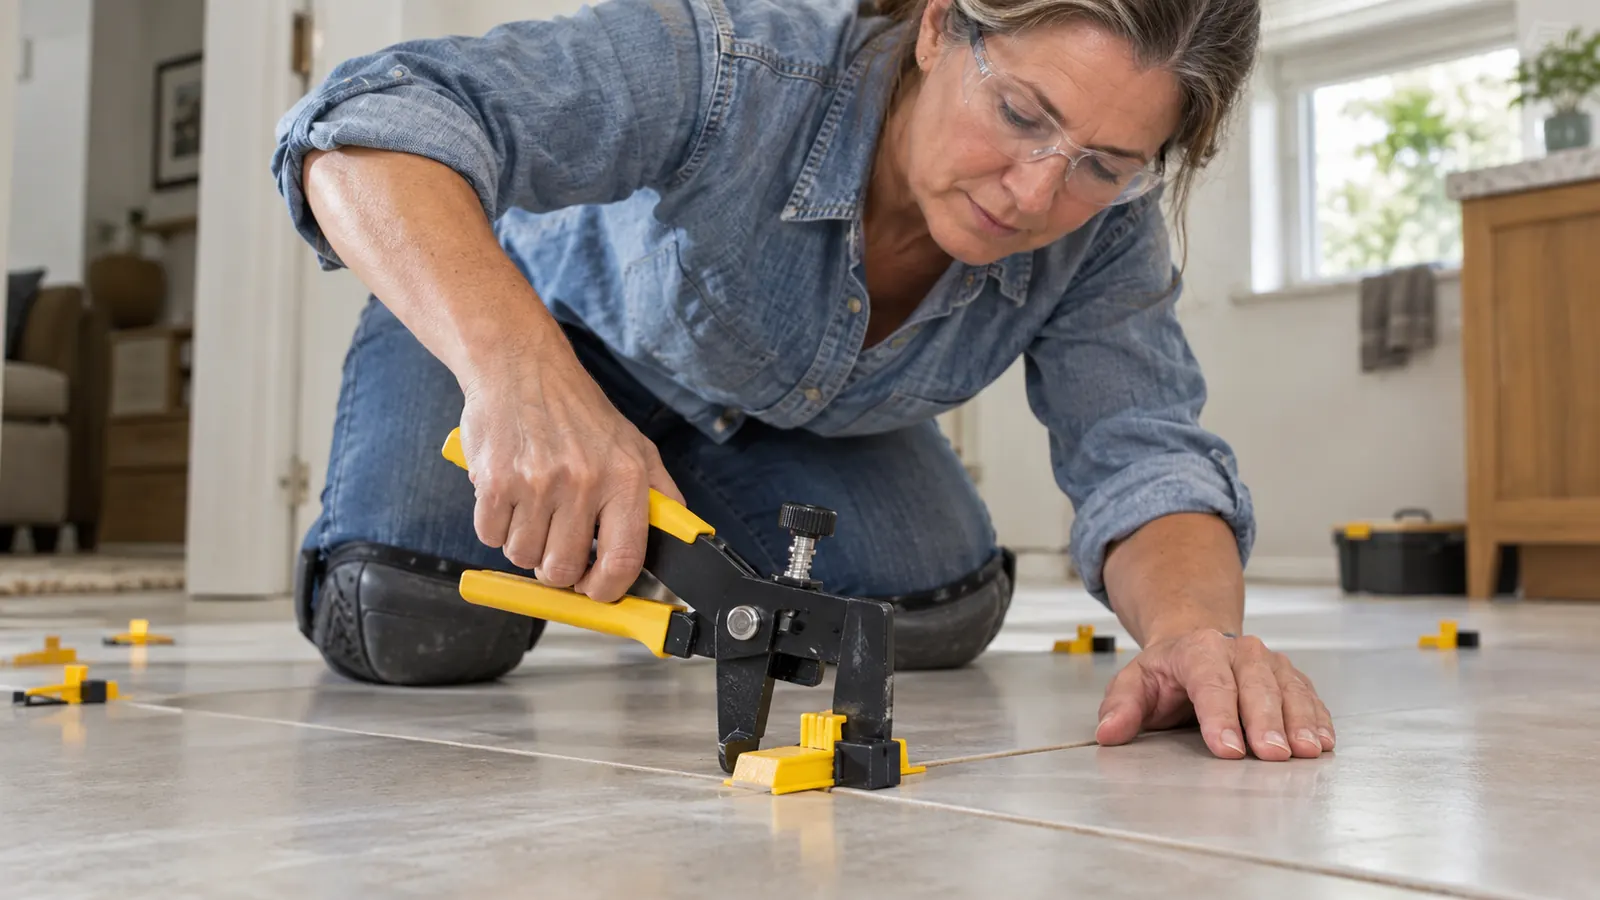
Here is where the DGSL system earns its keep. After you set a tile, slide a clip under the edge so the base sits beneath both tiles and the stem sticks up through the grout line. The clip base is thin, about 1/16 inch, so it will not push the tile up. Place a clip at each corner and, for larger tiles, one in the middle of each edge. I use two clips per side on a 12 by 24 inch tile, and it makes a noticeable difference.
Once the clip is in place, push the wedge down over the stem with your thumb, then tighten it with the plier tool. You will feel the tiles pull together and level out. The plier has a comfortable grip and enough leverage that you do not have to strain. Tighten until the wedge is snug, but do not crank it so hard that you crack the tile. You will develop a feel for it after a few tiles.
Work in small sections, maybe four or five tiles at a time. Let the thinset firm up slightly before you tighten the clips in the next section. If you tighten too early, the tiles can shift. If you wait too long, the thinset will be too hard to adjust. The window is generous, but it is not infinite. I set a timer on my phone for the first few batches until I got a feel for the pace.
A detail that makes a real difference: back-butter large tiles. Spread a thin, flat coat of thinset on the back of each tile before you set it into the combed bed on the floor. It takes a few extra seconds per tile, but it improves coverage under the tile and helps the clips pull the edges flush without leaving hollow spots. When I set a tile, I press it down and slide it slightly back and forth across the ridges, then place the clips and wedges and let the DGSL pliers do the final squeeze.

Step 4: Let the Floor Set, Then Snap the Tops
This is the step people get wrong. The clips are not meant to be removed by hand. You let the thinset cure for the time recommended on the bag, usually 24 hours, then you knock the tops off with a mallet or a block of wood. The DGSL stems are designed to snap cleanly at the base. I use a rubber mallet and a scrap piece of 2x4 to protect the tile, and the tops pop off with a satisfying crack.
Do not be tempted to pull the wedges out early. I did that once on a hallway floor because I was in a hurry, and I ended up with two tiles that settled unevenly. The whole point of the system is to hold the tiles in place while the thinset cures. If you remove the clips too soon, you lose that benefit. Wait the full cure time, then snap the tops.
After you snap the tops, sweep the floor and vacuum the little plastic pieces out of the grout lines. They are small and easy to miss, and they will cause problems if you grout over them. I keep a shop vac next to my work area for exactly this reason. A quick pass with the vacuum before grouting saves a lot of picking and poking later.
Resist the urge to walk on the floor too soon. I wait at least 24 hours before snapping off the clip tops, and longer in a cool room. Snapping them early can disturb tiles that have not fully set, which undoes the flat floor you just worked to create. Kick the tops off with a rubber mallet or a firm sideways tap with your foot in the direction of the grout line, never across it.
Step 5: Grout and Finish
Once the clips are snapped and the floor is clean, you are ready to grout. Mix your grout according to the package directions and work in small sections. Push the grout into the joints with a rubber float, then wipe the excess off with a damp sponge. The 1/16 inch joints from the DGSL system are tight, so the grout lines will look crisp and even. This is where all your prep work pays off.
After the grout dries, apply a sealer if your grout requires it. I use a brush-on sealer for the bathroom floor and a spray sealer for the kitchen. The sealer protects the grout from stains and makes it easier to clean. This is not a step to skip, especially in a bathroom or kitchen where the floor will see water and food spills.
Finally, step back and look at the floor in the light. This is the moment that makes all the effort worth it. A flat, level tile floor changes the way a room feels. The DGSL system is not magic, but it is the difference between a floor that looks DIY and a floor that looks like a professional installed it. I have had guests ask who I hired, and that is the best compliment a weekend remodeler can get.
What Else Helps
The DGSL Tile Leveling System is the star of the show, but a few other tools make the job easier. A good notched trowel, a level, a straightedge, a rubber mallet, and a tile cutter are all essential. I also use a small bucket of water and a sponge to keep the tile faces clean as I work. And I always keep a few extra tiles on hand in case one cracks. The DGSL kit includes 300 spacers and 100 wedges, which is enough for a small to medium room. For a larger space, you may want a second kit or the refill packs.
The clips are not magic, but they are the difference between a floor that looks DIY and a floor that looks like a professional installed it.
Your next tile project, flatter from the first row
The DGSL Tile Leveling System is the kit I keep in my garage workshop for every tile job. Grab it before you start your next floor.
Amazon Check Today's Price on Amazon →