
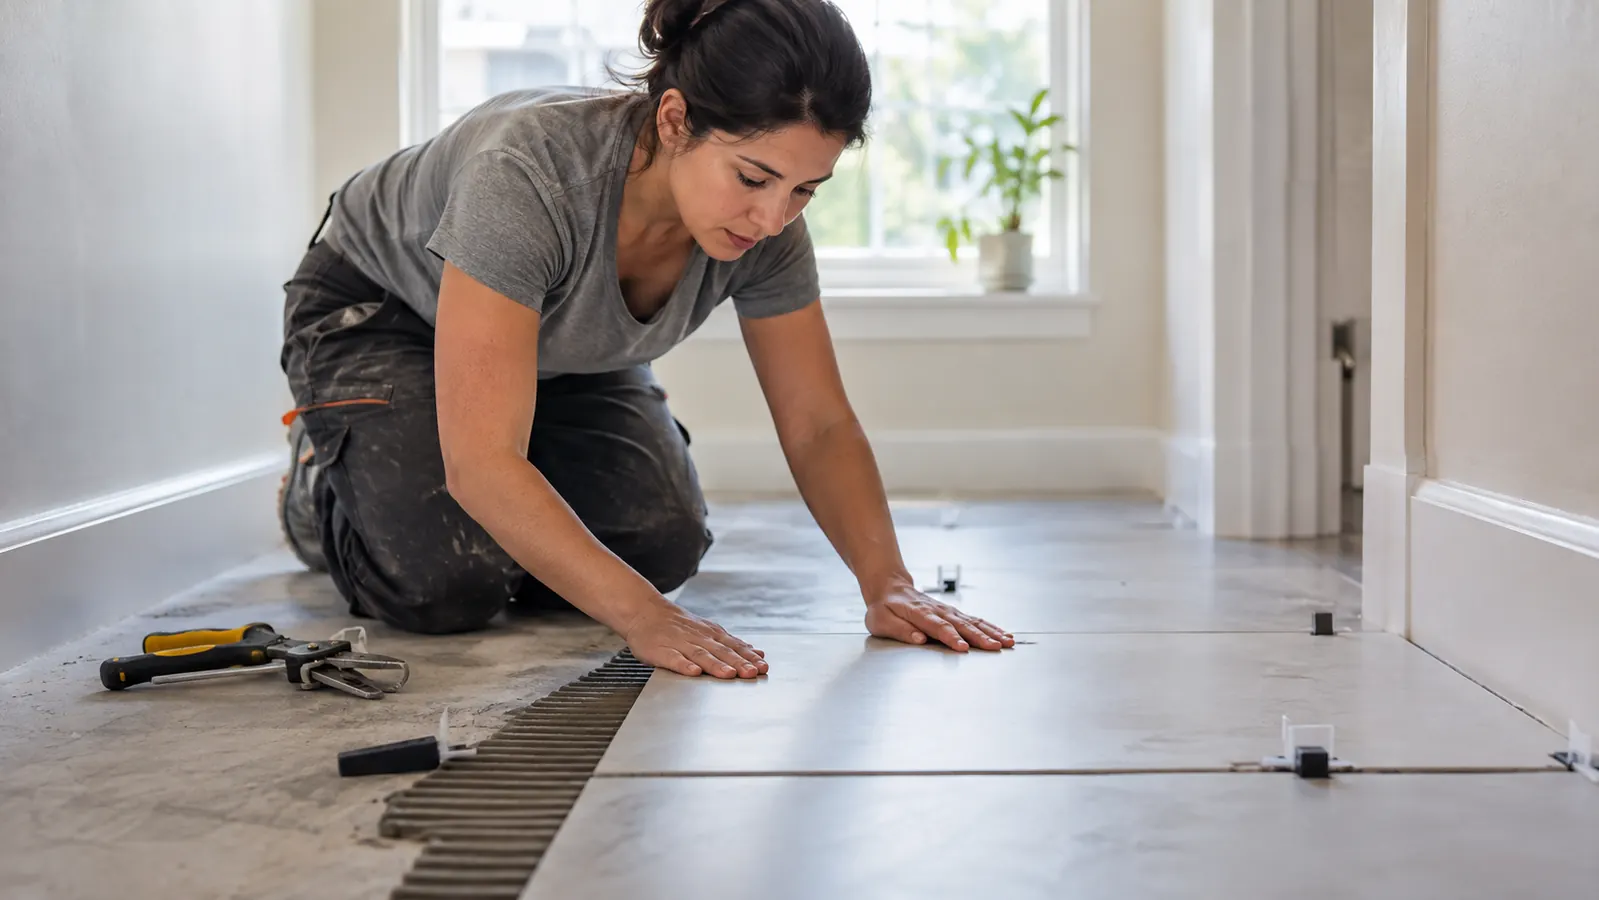
I will say this up front: I bought the DGSL Tile Leveling System because I was tired of looking at the floor in my laundry room. That floor was the first tile I ever laid, and it showed. Every few tiles, one corner would sit just a hair higher than the next, and no amount of grout could hide it. So when I started planning the hallway in my 1962 ranch, I told myself this time would be different. This time I would use leveling clips. And after about 400 square feet of tile, I have opinions.
The DGSL system is a set of plastic clips, wedges, and a pair of pliers that work together to hold two tiles level while the thinset cures. It is not a complicated idea, and it is not a luxury product. It is a tool that does one job, and it does that job well enough that I would buy it again. But there are a few things I wish someone had told me before I opened the box, and this review is the thing I wanted to read before my first tile went down.
The Quick Verdict
The DGSL Tile Leveling System does exactly what it promises for a DIYer willing to learn the rhythm: flat, even tile with a fraction of the lippage I got on my first floor. The pliers take practice, the wedges are single-use, and the clips can be stubborn to snap, but for the price, it is the most honest tile upgrade I have made in this house.
Amazon Check Today's Price →The leveling system that finally made my hallway tile look flat
If you are laying tile this weekend and you are tired of the lippage that shows up in every photo, this is the kit I reached for. It is not magic, but it is the difference between a floor that looks DIY and a floor that looks deliberate.
Amazon Check Today's Price on Amazon →How I Used It
I used the DGSL system on a 30-foot hallway in my house, about 400 square feet of 12x24 porcelain tile. My husband helped with the heavy parts, hauling tile and mixing thinset, but the layout, the cutting, and the setting were mine. I worked on weekends, usually a few rows at a time, and I used the system exactly the way the instructions show: set a clip under the edge of the first tile, lay the second tile, slide a wedge into the clip, and tighten it with the pliers until the two tiles are flush.
The first few clips felt awkward. The wedge wants to go in at an angle, and the pliers want to grip it a specific way, and I spent a good hour feeling like I was fighting the tool. Then it clicked. Once I figured out that the wedge needs to slide in straight and the pliers need to close fully before you squeeze, the system became almost automatic. I could set a clip, place a tile, and tighten it in about twenty seconds.
The kit comes with 300 clips, 100 wedges, and the pliers. That sounds like a lot, and it is, but you will use more than you think. I used roughly one clip per tile edge, and on a hallway with a lot of cuts, I went through the clips faster than I expected. The wedges are the part you will run out of first, because every clip needs one, and they are not reusable. I ordered a second bag of wedges before I finished the floor.
What Nobody Tells You About the Pliers
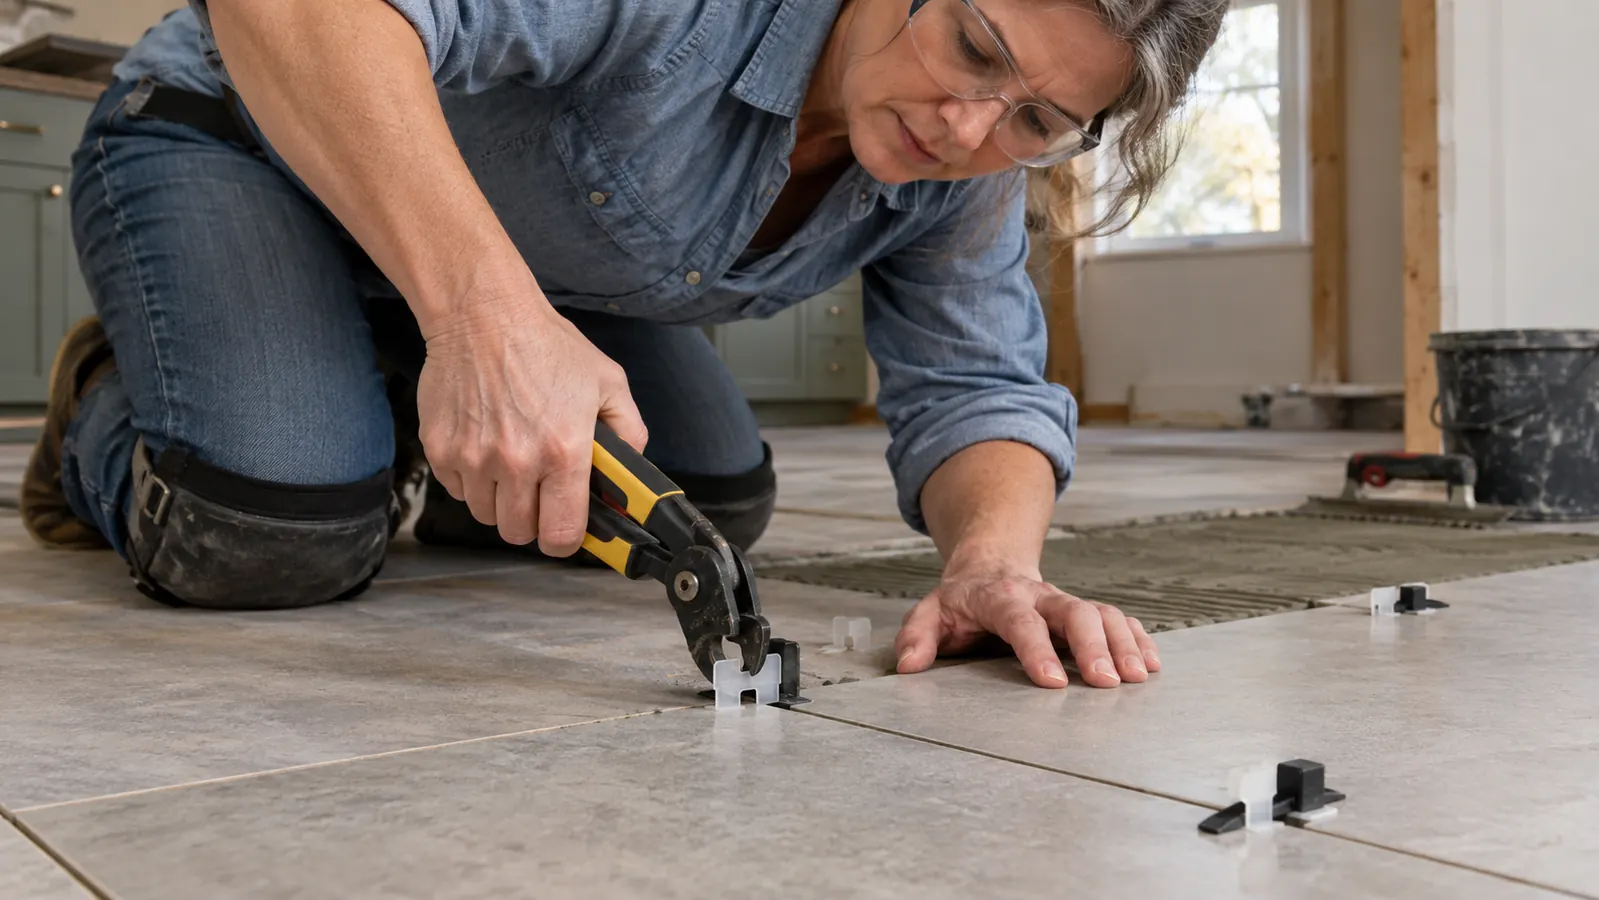
The pliers are the part of this system that gets the least attention in the product photos, and they are the part that matters most. The DGSL pliers have a two-stage action: the first squeeze pushes the wedge down into the clip, and the second squeeze locks it. If you do not squeeze hard enough, the wedge sits loose and the tiles are not actually level. If you squeeze too hard, you can crack the clip, which means you have to dig the broken piece out of the thinset before it cures.
The trick, and I learned this the hard way, is to listen. The pliers make a distinct click when the wedge is seated. Once I started waiting for that click instead of just squeezing until my hand hurt, my lippage problems mostly disappeared. The pliers also have a small notch on the side that you use to snap the tops off the clips after the thinset dries, and that notch works, but it takes a firm twist. On a few clips, I had to hit the top with a rubber mallet to get it to break clean.
One more thing about the pliers: they are not comfortable for a full day of work. The handles are hard plastic, and after a few hours, my palm was sore. I wrapped the handles in a bit of grip tape from my workshop, and that helped. It is not a dealbreaker, but it is the kind of detail that makes me wish the kit included a slightly better pair of pliers.
The Clips and Wedges: What Works
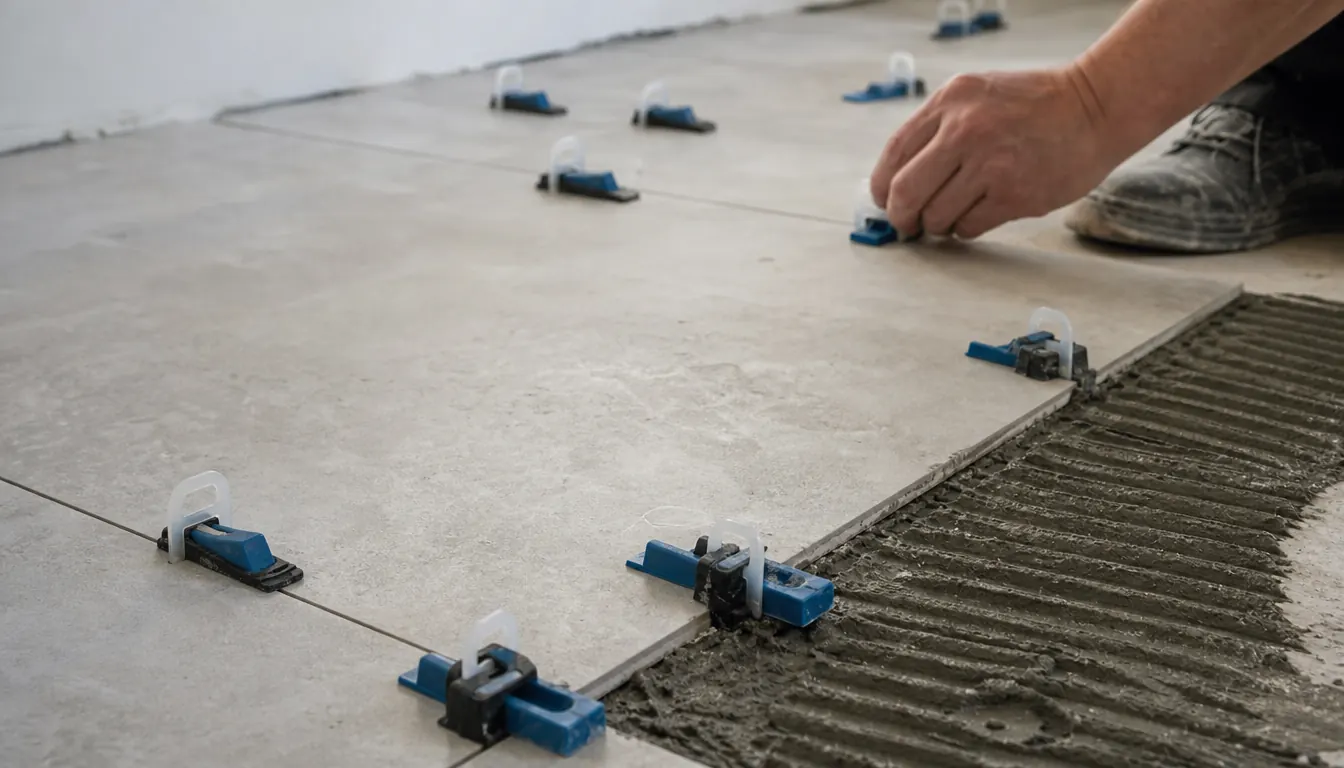
The clips are the heart of the system. Each clip is a small plastic piece with a U-shaped opening that sits under the edge of two adjacent tiles. The wedge slides into the opening and pushes down on the tops of both tiles, forcing them into the same plane. When the thinset cures, you snap off the top of the clip, and the bottom stays buried under the tile. The design is simple, and it works.
The 1/16-inch spacing is the right size for most wall and floor tile. It gives you a grout line that looks tight and modern without being so narrow that grout has trouble getting in. I used it with 1/16-inch grout spacers on top of the clips, and the combination was perfect. The clips also hold the tile in place while the thinset cures, which means you can walk on the floor sooner than you could with spacers alone, as long as you are careful.
The wedges are where the system gets a little annoying. They are single-use, and they are small, which means they are easy to drop into the thinset and lose. I dropped at least a dozen wedges into the bucket or onto the floor, and every one of them was a tiny moment of frustration. The kit includes 100 wedges, which is enough for a small room, but for a hallway, I needed more. I would recommend buying an extra bag of wedges at the same time you buy the kit, so you do not have to stop mid-floor to wait for a delivery.
The project where I learned the most was our guest bathroom floor. It is a small room, about 5 by 8 feet, and I used 12 by 24 inch porcelain tile, which is exactly the size that tends to show lippage because long tiles can bow slightly in the middle. I placed DGSL clips along each long edge, roughly every 8 to 10 inches, and set the wedges with the pliers as I went. When I came back the next morning and snapped the tops off, I ran my bare hand across every joint and could not feel a single ridge. On an earlier floor done with plain spacers, I could feel several edges catching my sock for years.
Where It Falls Short
The biggest weakness of the DGSL system is the snap-off step. After the thinset cures, you have to break the top of each clip off, and that top is made of a fairly rigid plastic that does not always break cleanly. On a few clips, the top snapped off but left a small nub sticking up above the tile. I had to shave those nubs down with a utility knife, which is exactly the kind of fiddly work that makes a tile job feel longer than it should.
The second weakness is the learning curve. The system is not hard to use, but it is not intuitive either. If you have never used leveling clips before, plan to spend your first hour practicing on a few scrap tiles. Do not start on a visible section of floor. I made that mistake, and there is a small section near my hallway closet where the tiles are slightly uneven because I did not tighten the wedges enough on my first try.
The third weakness is the pliers. They work, but they are not great. The two-stage action is a good idea, but the execution is a little rough. The handles are hard, the pivot is a little stiff, and the notch for snapping clips is not as sharp as I would like. If you are planning a large tile job, I would consider buying a better pair of leveling pliers separately, or at least be prepared to add some grip tape.
The first time I snapped a clip cleanly and ran my hand across two tiles that were perfectly flush, I actually said 'oh, that is nice' out loud. That is the moment the whole system became worth it.
What I Liked
- Pulls adjacent tiles flush so joints have no lippage you can feel
- Works well with large format tiles that tend to bow in the middle
- Pliers make tightening each wedge quick and consistent
- Wedges are reusable across projects
- Forgiving for one person working alone at a slow pace
Where It Falls Short
- Clips are single use, so a large floor needs a lot of them
- 1/16 inch clips set a tight joint that does not suit every tile
- Thinset squeezing up around clips has to be cleaned before it hardens
- Cannot fix a subfloor that is out of flat across the room
- Snapping tops off too early can disturb tiles that have not set
How It Compares to Plain Tile Spacers
If you have only ever used plastic tile spacers, the difference is night and day. Spacers keep the grout lines even, but they do nothing to keep the tile surfaces level. On a floor with any kind of subfloor variation, or tile that is not perfectly flat, spacers alone will give you lippage. The DGSL system does not eliminate the need for spacers, but it does eliminate most of the lippage, and that is the difference between a floor that looks professional and a floor that looks like a first attempt.
I still used spacers on top of the clips, because the clips do not control the grout line width. The clips control the plane, and the spacers control the gap. Together, they give you a floor that is both flat and evenly spaced. If you are trying to decide whether to spend the money on a leveling system, ask yourself how much you care about the finished look. If you are laying tile in a closet, skip it. If you are laying tile in a hallway or a bathroom where the light will catch every imperfection, buy it.
One more point that nobody mentions: the clips leave a small piece of plastic buried under every joint. That is how the system works, and it is completely normal, but it means you need to keep the joints clean of thinset that squeezes up around the clip before it hardens. I kept a margin trowel and a damp sponge nearby and cleaned each joint as I went. Skipping that step makes grouting harder later, because hardened thinset in the joint leaves less room for the grout.
The 1/16 inch spacer size is worth thinking about before you buy, too. It is a great size for rectified porcelain with tight joints, which is what I used. If your tile has rounded or uneven edges and needs a wider grout line, check which clip size suits it before you start, because the clip sets the joint width for the whole floor.
Who This Is For
This system is for the DIYer who has laid tile before, or who is willing to learn. It is for the person who looks at a tile floor and notices when the light catches a high corner. It is for the homeowner who is willing to spend an extra hour on the front end to save themselves from staring at a wavy floor for the next twenty years. If that sounds like you, the DGSL Tile Leveling System is a solid choice.
It is also for the person who is laying a lot of tile. The kit is a good value if you are doing a floor, a backsplash, or a bathroom. If you are only laying a small patch, the cost per square foot is harder to justify, and you might be better off with a smaller kit or a different brand. But for a real room, the system pays for itself in the first hour of not fighting lippage.
Who Should Skip It
Skip it if you are laying tile for the first time and you are not ready to learn a new tool. The system adds a step to every tile, and if you are already overwhelmed by thinset and spacers and cutting, the extra step might be too much. I would rather see a first-timer lay a small floor with plain spacers and accept a little lippage than watch them get frustrated and give up halfway through.
Skip it if you are laying tile that is already perfectly flat and your subfloor is perfectly level. That combination is rare, but if you have it, you do not need the clips. Skip it if you are on a tight budget and you are laying tile in a space where nobody will ever look closely. And skip it if you are not willing to buy extra wedges, because running out mid-floor is the most frustrating way to use this system.
The floor that made me a believer in leveling clips
If you are ready to lay tile that looks flat in every kind of light, the DGSL system is the kit I would buy again. It is not the fanciest tool in my workshop, but it is the one that made the biggest difference in how my hallway turned out.
Amazon Check Today's Price on Amazon →