
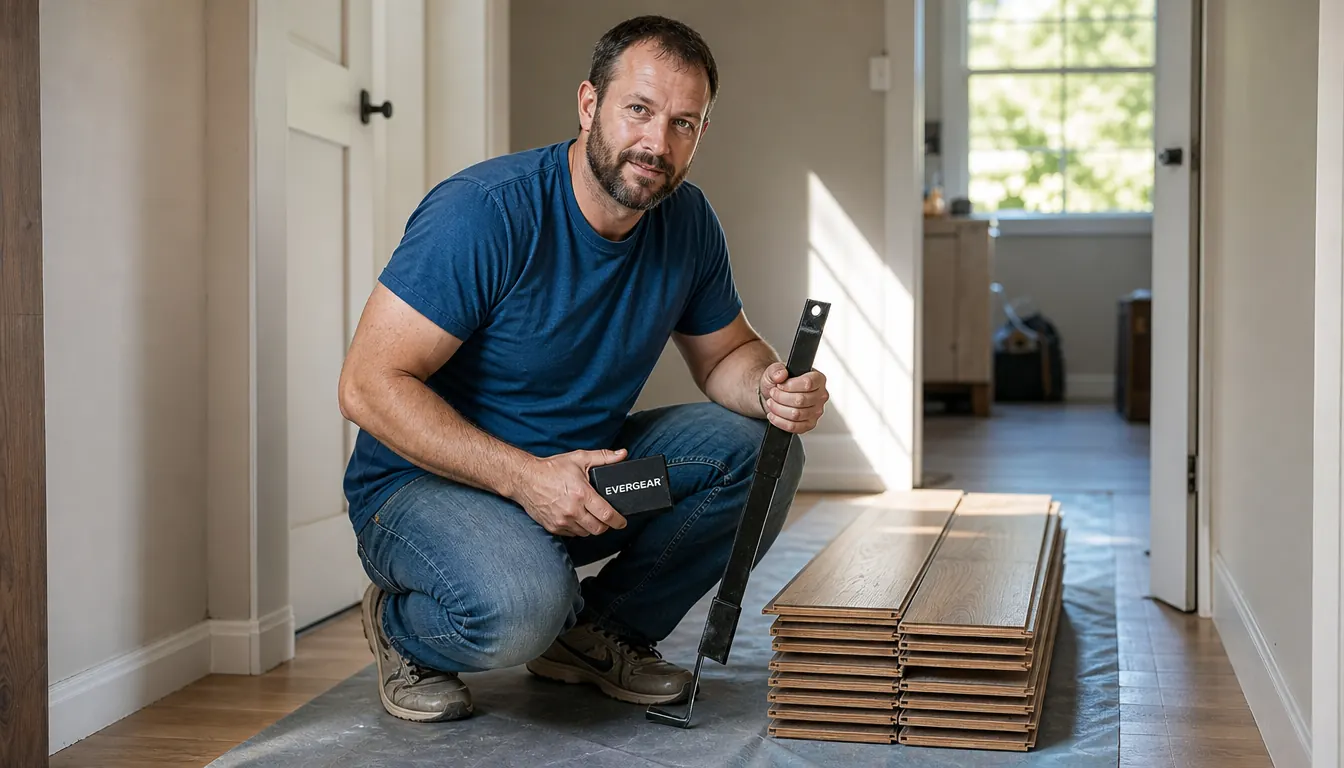
I have installed flooring in every room of my 1962 ranch over the past 14 years, and I can tell you exactly what nobody tells you about buying a 65-piece flooring kit: half the pieces will earn their keep, and the other half will sit in the box. The WORKPRO 65 PCS Laminate Flooring Tools for Vinyl/LVP Flooring Installation is one of the most popular kits on Amazon, with a 4.6 rating across nearly 4,000 reviews, so I wanted to find out which pieces actually matter when you are on your knees at hour six of a hallway install.
I bought this kit before laying LVP in my living room, and I used it again for the hallway and both bedrooms. This is the honest version of that experience: what WORKPRO gets right, what it gets wrong, and what I would tell a friend before they hit checkout.
The Quick Verdict
A genuinely useful kit for a homeowner, as long as you know that the mallet, pull bar and spacers are the real stars and the rest is backup.
Amazon Check Today's Price →What I Liked
- The mallet seats planks with one solid tap and protects the surface when you miss
- The pull bar works tight against walls where a tapping block cannot reach
- The spacers hold a consistent gap and stayed square through three rooms
- The soft case keeps the whole set together so nothing gets lost
Where It Falls Short
- The measuring tape and straight edge are basic and easily replaced by tools you likely own
- The soft case is not built for job-site abuse; it is a homeowner case
- A few secondary pieces feel like filler that pads the count to 65
The 65-piece kit that made my LVP install feel almost easy
After three rooms of flooring, the WORKPRO kit is still the first thing I reach for. The mallet has real heft, the pull bar grabs the plank edge without slipping, and the spacers are thick enough to actually hold a gap.
Amazon Check Today's Deal on Amazon →How I Used It
My living room is about 320 square feet, and I installed a rigid-core LVP with a drop-and-lock system. I used the WORKPRO kit for the whole room: the tapping block to seat the long seams, the pull bar for the last plank in every row, the spacers along the walls, and the mallet for everything that needed a firm hand. My husband helped with the heavy lifting, but the actual installation was mine.
I kept the kit on my folding work table in the garage between sessions, and I can confirm the case closes properly even when you are not careful about putting everything back in its exact spot. That matters more than it sounds like it matters, because a tool organizer that fights you will end up with pieces scattered across the workbench.
The kit also traveled with me to the hallway, which is a much tighter space. That is where I learned which tools I actually needed and which ones I was just moving out of the way.
One Saturday I blocked out the whole day for the living room, measured the room at 12 feet 8 inches by 25 feet 4 inches, and added ten percent for waste. The first row took forty-five minutes because I kept checking the expansion gap. By the last row I was setting a plank every ten minutes. That pace came from the mallet and pull bar, not from any skill of mine.
What Nobody Tells You About the Mallet
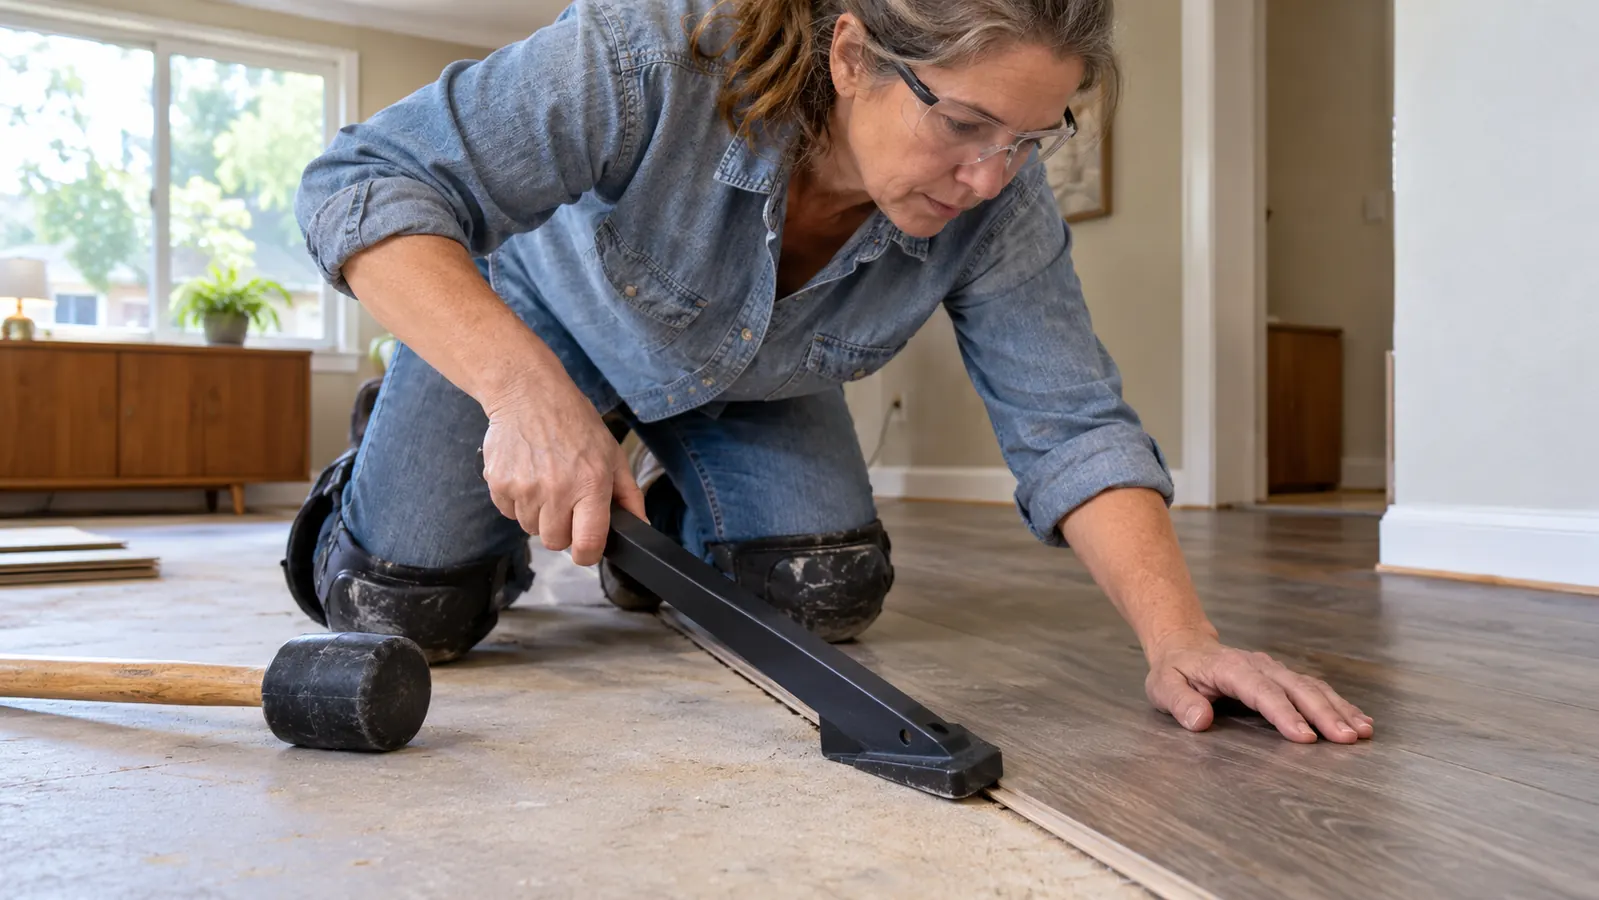
The mallet is the first thing you will grab and the last thing you will put down. WORKPRO includes a rubber mallet with a weighted head, and it is genuinely good. It has enough mass to seat a plank with one solid tap, but the rubber face means you are not denting the surface when you miss. I missed plenty of times, especially at the end of a long day, and I never damaged a single plank.
What nobody tells you is that you do not need to hit the tapping block hard. The mallet does the work. A light tap, a check with your fingers along the seam, another light tap. If you are swinging it like a hammer, you are using too much force and you will eventually split a tongue. I know this because I split one tongue in the bedroom, and it was my fault, not the kit's.
The first time I used the mallet, I was still treating it like a finish hammer. I gave the tapping block a solid swing, the plank seated, and the sound echoed down the hallway. It worked, but it was more force than the job needed. By the second row I had learned to let the weight of the head do the work, and the seams started closing with a soft thunk instead of a crack. That is the difference between fighting a floor and working with it.
The mallet has enough mass to seat a plank with one solid tap, but the rubber face means you are not denting the surface when you miss.
The Pull Bar Is the Real Hero
The pull bar is the tool that separates a good flooring day from a miserable one. When you are installing the last plank in a row, you cannot reach the seam with a tapping block because the wall is in the way. The pull bar hooks over the end of the plank, and you tap the bar to pull the plank tight. WORKPRO's version has a flat hook that grabs the plank edge cleanly, and it did not slip once during my installs.
I have used pull bars that flex or skate off the plank edge, and they turn a five-minute task into a twenty-minute frustration. This one is stiff enough to transfer the tap directly into the seam, and the angle is right for working close to a wall. If you only ever use three pieces from this kit, the pull bar is one of them.
The moment I knew the pull bar was good was in the hallway, which is only 36 inches wide. I was on the last row, working against the baseboard, and I could not get a tapping block anywhere near the seam. I hooked the pull bar over the plank, gave it two taps, and the seam closed flush. Then I did it again for the next plank, and the next, and the next. In the living room I had wrestled with that same task for twenty minutes using a pry bar from my workshop. The WORKPRO pull bar did it in under a minute per plank.
A few weeks after the hallway install, one plank near the door started popping up. I hooked the pull bar over the edge, gave it two light taps, and the seam closed for good. That repair sold me on the pull bar more than the original install did.
The Spacers and Wedges Do the Quiet Work
Spacers are the least glamorous part of any flooring install, and they are also the easiest to get wrong. WORKPRO includes a set of spacers and wedges that are thick enough to hold a consistent expansion gap along the wall. I used them along every wall in the living room, and the gap stayed even enough that the baseboard covered it without any awkward moments.
The wedges are useful for the last row, where you are often working with a plank that has been cut to width and needs to be held in place while the adhesive or the lock engages. I would not have thought to use them for that on my first install, but by the third room I was reaching for them automatically.
I checked the gap with a quarter along the wall in three places in the living room, and it was consistent every time. That is the quiet win. A spacer that is too thin lets the floor shift, and a spacer that is too thick leaves a gap you have to hide under the baseboard. WORKPRO's spacers are right in the middle, and they stayed square through all three rooms. I expected them to be the first thing to fail, and they were the last.
What I Would Skip in the Kit
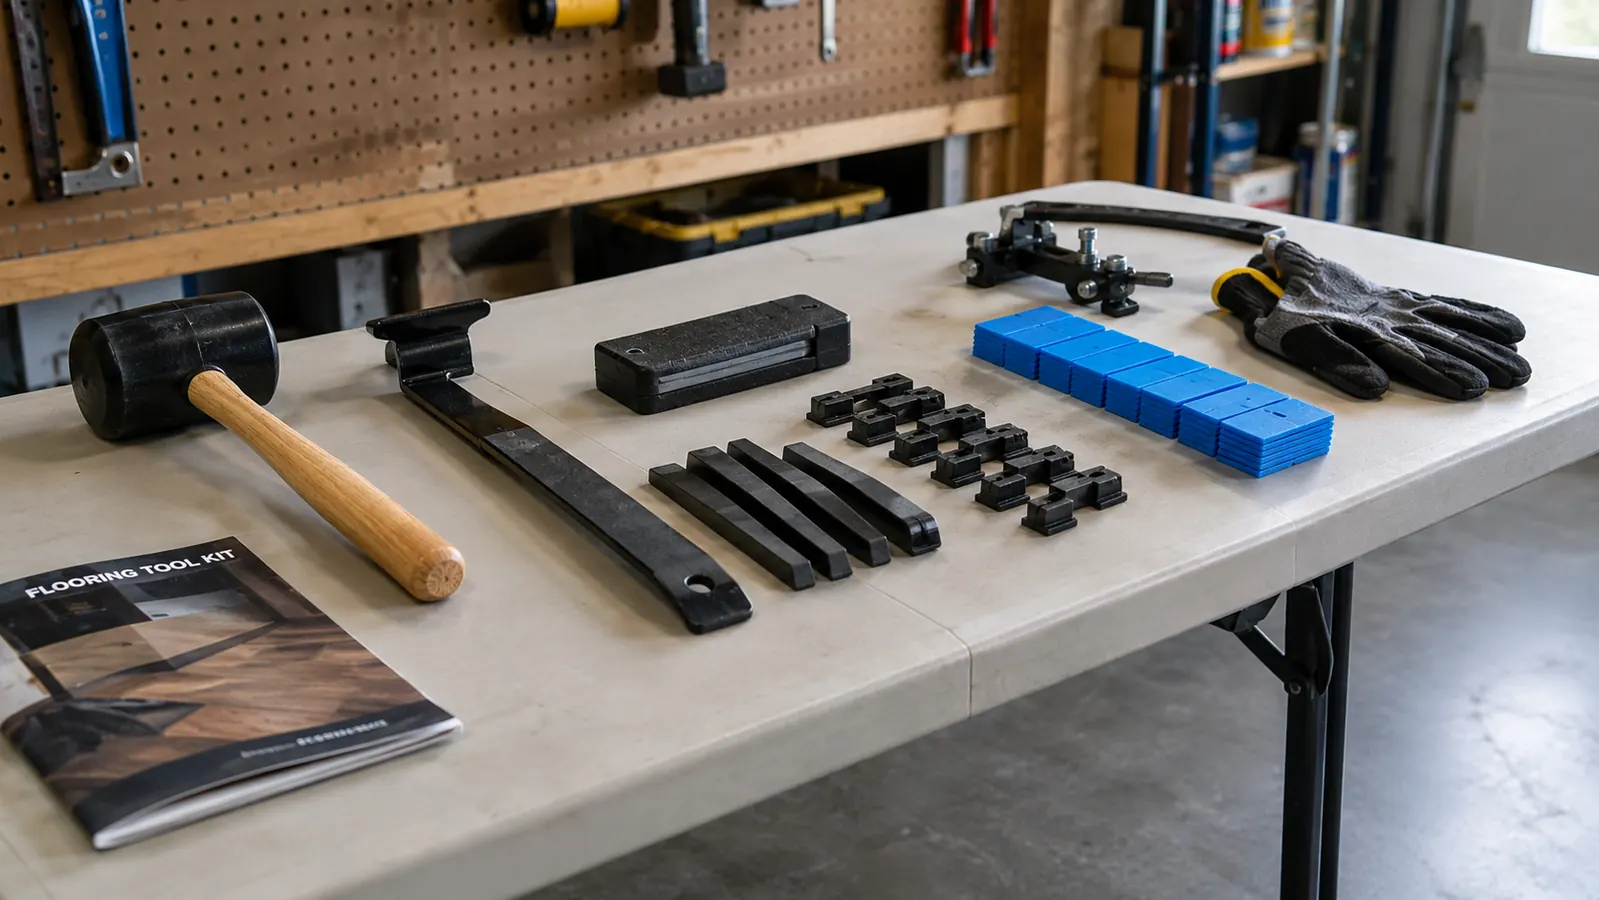
Here is the honest part. The kit includes a measuring tape, a utility knife, a pencil, and a few other pieces that are fine to have but not worth carrying in a dedicated flooring kit if you already own basic tools. I have a workshop in my garage with a pegboard wall, so I already had all of those. They are not bad tools. They are just not the reason you buy this kit.
The piece I reached past most often was the small straight edge. It is fine for marking cuts, but I found it easier to use a longer straight edge from my workshop because it gave me a more reliable line across a full plank. That is a preference, not a flaw, but it is the kind of thing I wish someone had told me before I bought a 65-piece kit.
I also want to be honest about the case. It is a soft-sided organizer with a zipper, and it holds everything, but it is not a hard case. If you are throwing this kit into the back of a truck on a job site every day, the case will not protect the tools the way a hard case would. For a homeowner who carries it from the garage to the living room, it is completely fine.
The measuring tape is the piece I used least. I have a 25-foot tape on my pegboard that I have trusted for years, and I kept reaching for that one out of habit. The kit's tape is perfectly serviceable, and if you are buying this as your first flooring kit, you will be glad it is in there. But if you already own a tape, a knife, and a pencil, you are paying for duplicates. That is not a reason to skip the kit, because the core tools are the value. It is just the honest math of what you will actually use.
I kept a notebook while I installed, and the tally came out exactly as expected: the mallet, pull bar, spacers, and tapping block were used on every row. The straight edge got used maybe six times. The measuring tape never left the case because I reach for the 25-foot tape on my pegboard. If you already own a tape and knife, you are buying this kit for four or five pieces, and that is still okay.
How It Holds Up Over Time
I have used this kit for three rooms over about eight months, and the mallet and pull bar show almost no wear. The rubber face on the mallet still looks new, and the pull bar has not bent or lost its grip. The spacers are still square, which is the thing I expected to fail first, because cheap spacers tend to compress or warp.
The utility knife blade is the only thing I replaced, and that is normal maintenance, not a defect. The measuring tape still works fine, though I mostly use my own. The kit is not a lifetime investment in the way a dedicated professional mallet might be, but for a homeowner kit, it has held up better than I expected.
The zipper on the case is the part I watch. It has survived eight months of being carried from the garage to the house, set down on a concrete floor, and packed back up at the end of a long day. It still closes smoothly, but I can tell the fabric is not going to last forever. If the zipper ever gives out, I will move the core tools into a small plastic tote and keep going. The tools are the investment. The case is just transportation.
Last week I pulled a gouged plank in the living room, cut a replacement with the kit's knife, and seated it with the mallet and spacers. The repair took twenty minutes and made me trust the kit as a maintenance set, not just an installation one.
Who This Is For
This kit is for the homeowner who is about to install laminate or LVP in one or two rooms and does not want to buy six separate tools. It is also for the person who has never installed flooring before and needs a kit that includes the mallet, pull bar, spacers, and wedges without having to figure out which ones to buy. The WORKPRO kit gives you a complete starting point, and the core tools are good enough to finish the job.
If you are the kind of person who likes to lay everything out on a work table before you start, this kit is satisfying in a way that is hard to explain. You unzip the case, and there is a place for everything. You do not have to run to the hardware store halfway through the first row because you forgot a spacer. You just reach into the case, grab the piece you need, and keep going. That is worth a lot when you are already tired and the floor is only half done.
Who Should Skip It
Skip this kit if you are a professional installer who already owns a dedicated mallet, pull bar, and spacer set, because you will not use half of what is in the box. Skip it if you need a hard case for job-site travel. And skip it if you expect every piece to be a premium tool, because the secondary pieces are basic. The core tools are the value here, and the rest is convenience.
I would also tell a friend to skip it if they are only installing one small closet or a single bathroom floor. For a space that small, you can get away with a tapping block, a pull bar, and a handful of spacers bought individually. The WORKPRO kit makes the most sense when you have at least one full room ahead of you, because that is when the convenience of having everything in one case starts to pay for itself.
The honest bottom line: buy it for the mallet, pull bar, and spacers
Three rooms in, the WORKPRO kit has earned its place in my workshop. The core tools are genuinely good, the case keeps everything together, and it makes sense for a homeowner who wants one box instead of a shopping list.
Amazon Check Today's Deal on Amazon →